In this blog post, we’ll stroll you through the process of submitting your sitemap to Google, as well as some advisable practices for sitemaps.
To ensure that Google crawls and ranks your site properly, there are only a few essential actions that you simply need to perform first.
One of these duties is making a sitemap for your site and importing it to Google. By immediately submitting a sitemap, you assist Google’s crawl bots to index your site, which in turn helps them comprehend your site’s relevancy and resolve the place your site ranks.
What is a Sitemap?
An XML file that lists your entire URLs included inside your weblog is called a sitemap. Crawlers shall be able to discover all of your blog’s URLs with the assistance of this file.
Sitemaps are paperwork that lay out your site’s hierarchy and guidelines for each internet web page in a style that could be studied by Google’s crawlers. You may use your sitemap to decide on content material materials hubs and to be a part of the inside page to one.
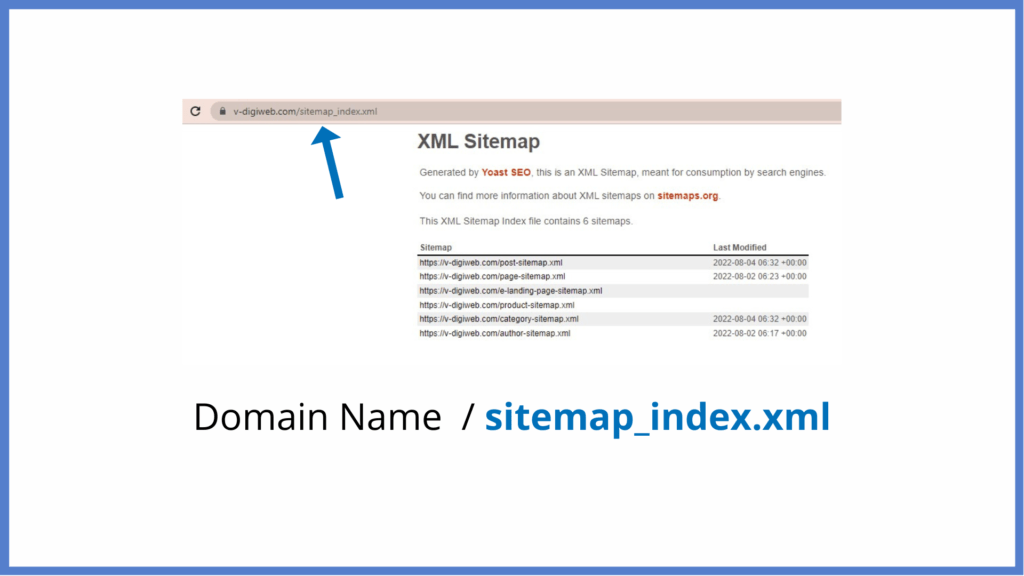
Chances are you’ll even see an occasion of a Sitemap file inside the screenshot that is confirmed beneath:

How to Submit a Sitemap to Google
You’ll need a Google account to get started.
The following is a list of the steps that you just simply need to observe:
Step1: Join or Create a Google search console, Account:
Our Google Search Console Setup Guide will give you everything you need to know regarding the system as a beginner, such as how to set it up and which studies one can find most useful.
Step 2: Select your Web page
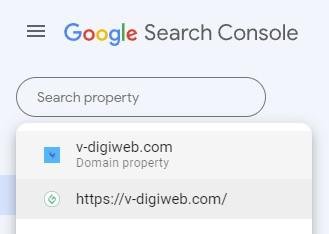
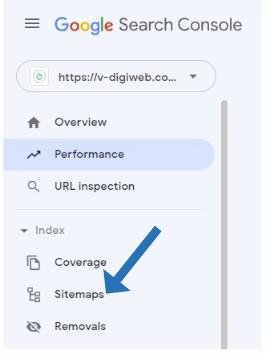
Step 3: Select “Sitemaps:”
Step 4: Add your Sitemap URL (sitemap_index.xml)
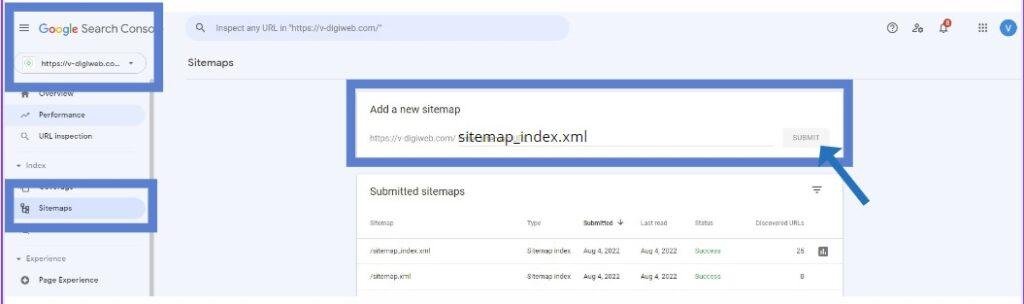
Step 5: Click on submit
How to enable and look at the XML sitemap with the Yoast SEO plugin
Sitemaps may be created using one of the numerous free online programs, such as Inspyder Sitemap, Flowmapp, Frog XML Sitemap Generator, and many more.
In the event you’re using the Yoast SEO plugin, follow these steps to enable and look at the XML sitemaps:
Step 1: Log in to your WordPress site.
Chances are you’ll be on your “Dashboard” after you might have logged in.
Step 2: Click on “Yoast SEO positioning”:
You’ll see a menu on the left-hand side. Go to that menu and select “Yoast SEO ”
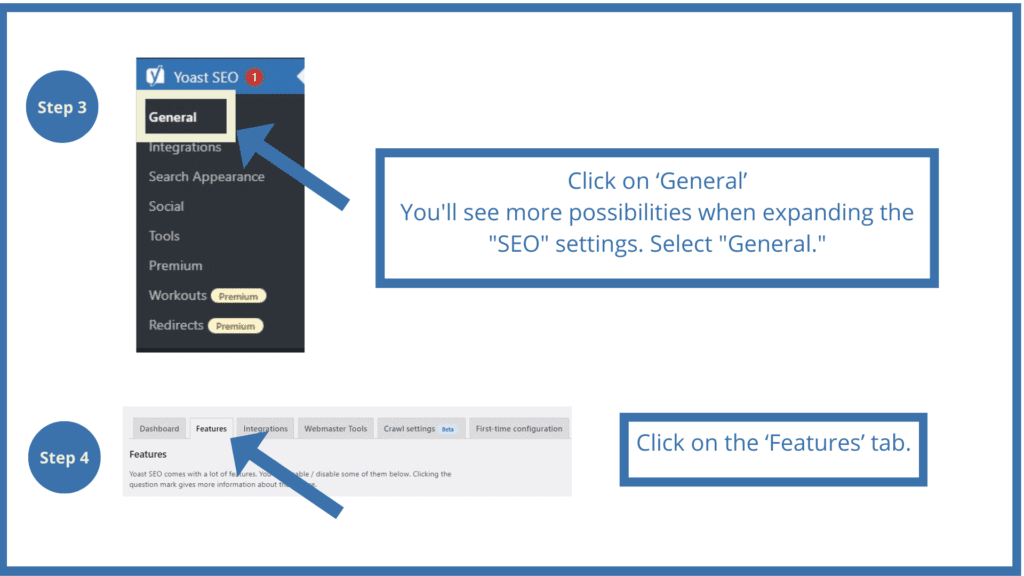
Step 3: Click on “General”
You’ll see extra potentialities when rising the “Website positioning” settings. Select “Regular.”
Step 4: Click on the “Features” tab.
Step 5: Switch on “XML Sitemaps” and then click “Save Changes” at the show display’s bottom.
To permit the attribute, toggle the swap to ‘On’.
To disable the attribute, toggle the swap to ‘Off’.
Step 6: Click on the question mark subsequent to the XML sitemap function to view the sitemap.
Click on on ‘See the XML sitemap’ hyperlink.

Your sitemap file shall be crawled by Google, and the search engine will begin scanning and indexing your entire hyperlinks which might be specified inside the sitemap file that was provided.
Conclusion:
After we assemble an internet website, one of the essential typical challenges that we’re confronted with is figuring out how to guide the site in SERPs resembling Google. Sitemaps are documents that present the grouping of your site and procedures for each internet web page in a fashion that Google’s crawlers can understand. Your sitemap is also used to discover content hubs and hyperlinks inside pages collectively.